How to create macro buttons in Excel and Word

Mar 11, 2002 | Beth
Blakely | E-Mail

|
How to create macro buttons in Excel and Word |
Last week, I told you how to create
a macro to insert custom headers and footers in your Excel documents. Now
I'll show you how to make that macro, and any others you might create, even
easier to use. You can create a custom button for your toolbar that will
activate a macro in both Microsoft Excel and Microsoft Word.
Create a macro button in Microsoft Excel
The following directions were written using Microsoft Excel 2000. Instructions
for other versions may differ slightly.
|
Figure A |
|
|
|
Figure B |
|
|
|
Figure C |
|
|
You may now run your macro by clicking the button you've created. It will be
available from all workbooks.
Create a macro button in Microsoft Word
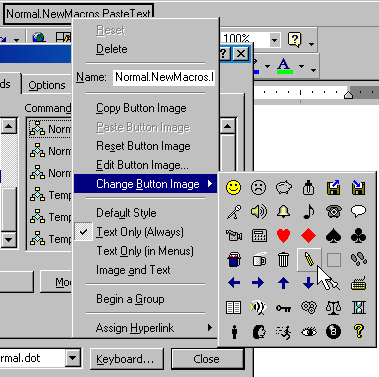
Creating a macro button in Microsoft Word is similar to creating one in Excel.
The following directions were written using Microsoft Word 2000. Instructions
for other versions may differ slightly. Before starting the steps below, I
created a macro, named PasteText, to paste unformatted text in Word documents.
To create a macro button:
|
Figure D |
|
|
|
Figure E |
|
|
You may run your macro by clicking the button you've created. It will be
available from all documents.
Created Date: 03/14/2002 Last Reviewed: 03/14/2002 Rev. Date: