Click
below to see the following objectives.
|
|
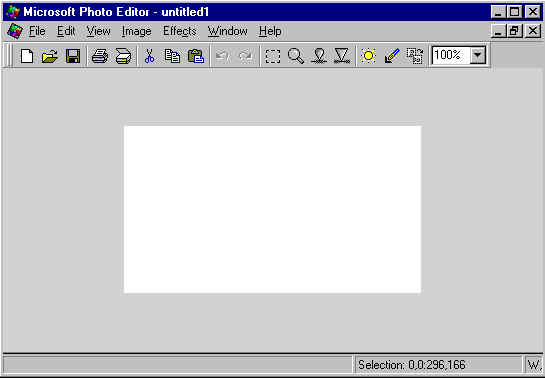
Microsoft Photo Editor
allows you to customize graphic images you create, scan, or open.
·
![]() Move Handle-
Allows one to move the
location of the toolbar.
Move Handle-
Allows one to move the
location of the toolbar.
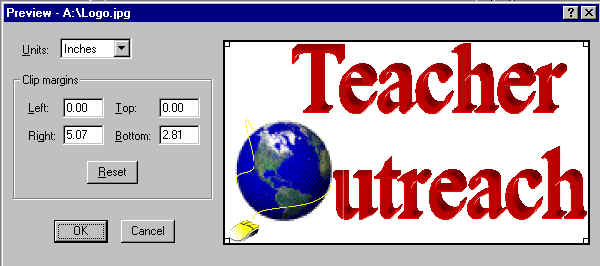
NOTE: In the Preview menu, you cannot increase the size of the picture and you
cannot resize the image proportionately.
NOTE: If a scanner is not hooked up correctly or not hooked up at all, an error
will come up.
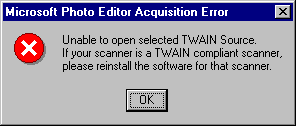
NOTE: You can select another TWAIN device,
such as a digital camera, instead of a scanner. You can select any TWAIN device
that is attached to your computer if it appears in the "Sources" box.
If your scanner is not listed in the "Sources" box, one of the
following messages appears:
* To learn more
about scanners, go to the scanner link located under the heading Hardware.
5. Click
"Save."
There are two methods of quitting
Microsoft Photo Editor:
Or
Or
1.
Open or create a new image.
2.
On the Image menu, click "Rotate."
3.
Select any "Orientation" and "Image" options you
want, and then click "OK."

NOTE: If you select "By Degree"
under "Orientation,"
type a number or click the arrows to select the
degrees you want.
You can change the magnification using two different methods:
2. Click
the Zoom button on the Standard toolbar.
·
To zoom in, click the area you
want to enlarge.
·
To zoom out, hold down SHIFT
and click the area you want to shrink.
When you are done, click the Zoom button
again to cancel the Zoom feature.
The Smudge Brush smears or blends adjacent
colors when you drag the brush across the image.
1.
Click the Smudge button on the Standard toolbar.
2.
Drag the pointer over the area you want to smudge.
The Sharpen Brush increases the difference
between adjacent gray values when you drag the brush across the image.
1.
Click the Sharpen button on the Standard toolbar.
2.
Drag the pointer over the area you want to sharpen.
You can use transparent areas to integrate
an image into your document, presentation, or Web page.
1.
Click the Set Transparent Color button on the Standard toolbar.
2.
Click the area of the image you want to make transparent.
The "Change Color to Transparent" dialog box appears. The preview
window shows the color that changes to transparent when you click
"OK." You can also increase the range of colors that become
transparent or change the degree of transparency.
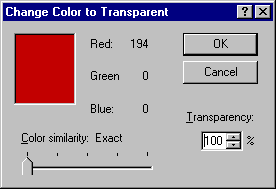
3.
Click "OK."
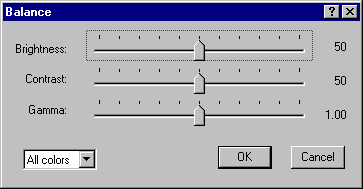
The Brightness control changes the amount
of white in all colors and shades of gray. The Contrast control changes the
difference between adjacent colors or shades of gray. The Gamma control changes
the contrast in the dark areas of the image.
1.
Click the Image Balance button on the Standard toolbar.
2.
Move the "Brightness," "Contrast," and
"Gamma" sliders to the right to increase the brightness, contrast, and
gamma; or move the "Brightness," "Contrast," and
"Gamma" sliders to the left to decrease the brightness, contrast, and
gamma. To adjust all colors, select "All Colors" in the lower-left
list before moving the slider. To adjust the color channels separately, select
"Red," "Green," or "Blue" before moving the
slider.
1.
Select all or part of the image you want to copy.
2.
On the Edit menu, click "Copy."
3.
Open the document or image you want to copy the selection into.
4.
On the Edit menu, click "Paste."
1.
Select all or part of the image that you want to Erase.
2.
On the Edit menu, click "Cut."
1.
On the Image menu, click "Resize."
2.
Type a new measurement or percentage for the width and height.

3.
Select any other options you want.
4.
Click "OK."
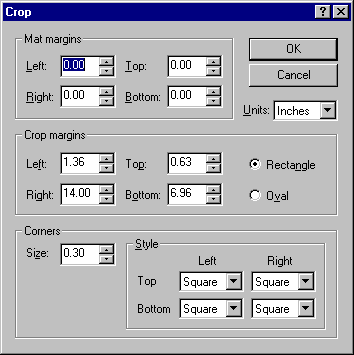
1.
Select the area of your image you want to keep.
2.
On the Image menu, click "Crop."
3.
Select the options you want, and then click "OK."
1.
Select the part of the image you want to move and paste.
2.
Move the selection to a new location by clicking on the selected area and
moving it to its new location.
3.
Paste the selection by clicking the Select button on the Standard
toolbar.
1.
Select all or part of the image that you want to move.
2.
On the Edit menu, click "Cut."
3.
Open the image or file you want to move the selection into.
4.
On the Edit menu, click "Paste."
Note: After the selection appears in the
new image or file, you can drag it to another location within the new image or
file.
1.
To cancel an active selection, press the ESC button on your keyboard.
·
To cancel the last action,
click the Undo button on the Standard toolbar.
·
To restore the last action,
click the Redo button on the Standard toolbar.
2. Click
"OK."
1.
To automatically adjust the brightness and contrast levels of an image,
click "AutoBalance" on the Image menu.
·
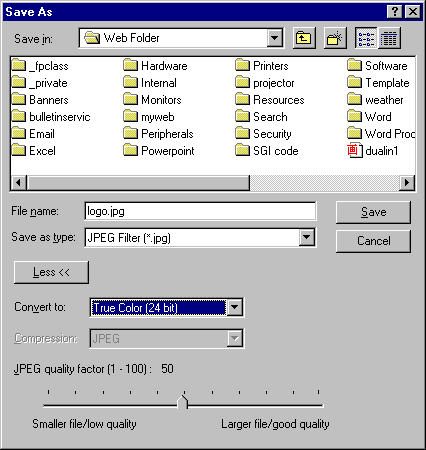
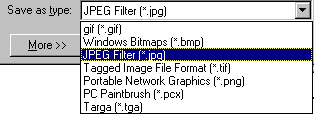
Changing
the File Format of an Image
1.
On the File menu, click "Save As."
2.
In the Save As Type box, click the file format type you want.
1.
On the File menu, click "Properties."
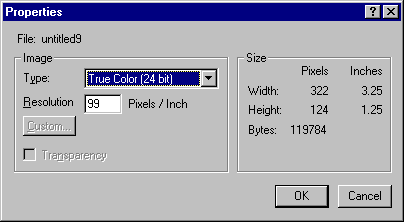
2.
Under Image, in the Type list, select the type of image you want.
NOTE: To learn
more about the images press the F1 button.
If you select Palette or 256 color (8 bit), do the following:
a.
Click "Custom."
b.
For fewer than 256 colors, click "Variable" and type a number
in the "Number of Colors" box.
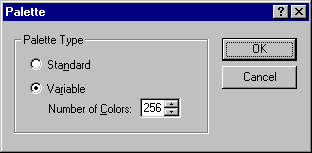
or
For 256 colors,
click "Standard."
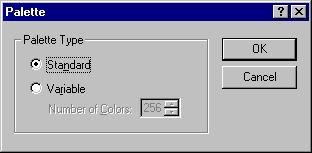
c.
Click "OK."
If you select "Monochrome," do
the following:
a.
Click "Custom."
b.
Select the halftone options.
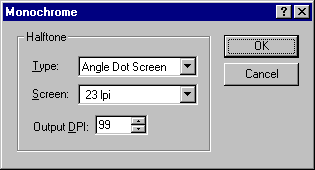
c.
Click "OK."
1.
On the File menu, click "Properties."
2.
In the Resolution box, type the value you want.
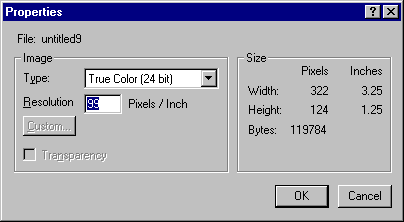
3.
Click "OK."
1.
Select all or part of an image.
2.
On the Effects menu, click the effect you want to apply. They are located
below the separator line.
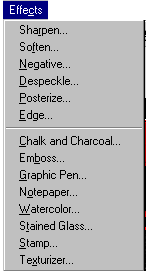
3.
Make any adjustments you want.
4.
Click "Preview."
5.
Click "Apply."
1.
Select all or part of an image.
2.
On the Effects menu, click the effect you want to apply. They are located
above the separator line.
3.
Make any adjustments you want.
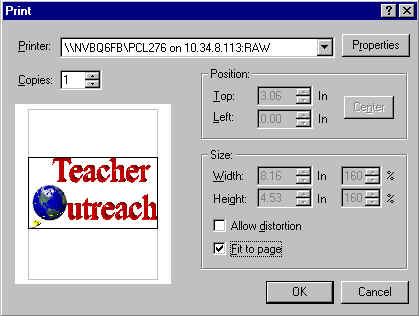
You can send an image as an e-mail
attachment, using the following steps:
1.
On the File menu, click "Send."
2.
Your e-mail program starts, a new message is created, and the image is
attached to the message.
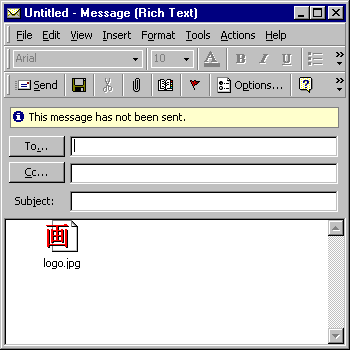
3.
Send as you normally send e-mail.
Created Date: 02/26/2002 Last Reviewed: 02/26/2002 Rev. Date: